In our previous appium tutorial, we gave a detailed introduction to Appium for automation testing of mobile applications.
Prerequisites to use Appium:
- .Net Framework (https://www.microsoft.com/en-in/download/details.aspx?id=30653)
- Java Development Kit (http://www.oracle.com/technetwork/java/javase/downloads/index.html)
- SDK (https://developer.android.com/studio/index.html)
- Eclipse (http://www.eclipse.org/downloads/)
- Appium setup for Windows (https://bitbucket.org/appium/appium.app/downloads/)
- Appium Client Libraries-Jar file (http://appium.io/downloads.html)
- Selenium Client Libraries- Jar Files (http://docs.seleniumhq.org/download/)
- Steps to download .Net Framework:
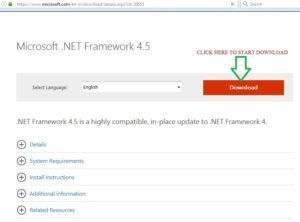
- Step 1: Open the link provided to open Microsoft site to download .Net Framework into your machine if it is not installed earlier.
https://www.microsoft.com/en-in/download/details.aspx?id=30653
- Step 2: Click on Save File from the pop-up to save the set up file.
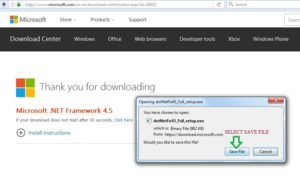 3.Install .net framework by double click on the setup file saved into local machine. Keep all default settings and click on next and install .net framework into your local machine.
Steps to Install Java Development Kit (JDK):
Below are the steps to install JDK and set environment variables which are very important to run android and test cases in Appium.
Step 1: Go to the link provided to download JDK
http://www.oracle.com/technetwork/java/javase/downloads/index.html
Step 2: Click on the JDK button as shown below;
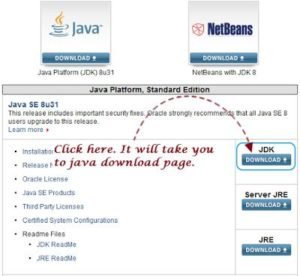
Step 3: It will take you to download page where you have to click on Accept License Agreement to proceed further to download. Select any OS which is pertaining to your machine architecture.
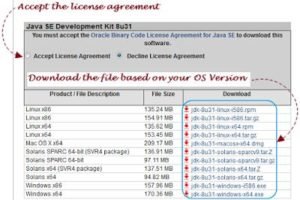
For example if windows 32 bit then select Windows x86 and if Windows 64bit then select Windows x64.
Step 4: Click on Save File to start downloading the file into your local machine.

Step 5: Double click on the downloaded file to start installation.

Step 6: It will launch the installation dialogue box click on next to continue as shown below

Step 7: Go on clicking next with default settings and at last click close to finish the installation part of Java.
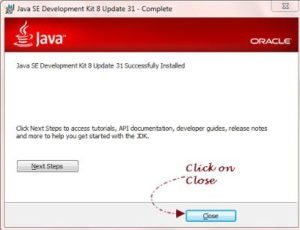
Now as Java is installed now the main important part is to set environment variables into the machine.
Step 8: Right click on Computer and click on Properties to open System Properties.
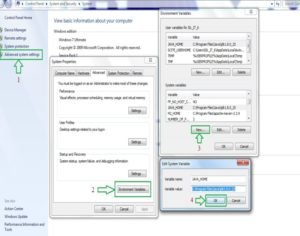
Step 9: Click on Advanced system settings and click on Environment Variables and click on New and give Variable Name as JAVA_HOME and in value specify the JDK path and click on OK.
Step 10: Now have to paste same JDK path into Path variable for that follow the steps as shown in below image.

- Click on Advanced system settings
- Click on Environment variables and
- Select Path from System variables list and click on edit.
- Now in value just insert ; (Semi-colon) and paste the JDK path and click ok.
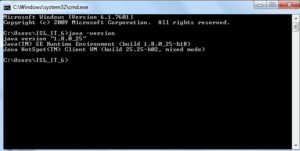
Now all the environment variables are set we have to check whether java is correctly installed or no, for that open command prompt and type “java –version” and if you see the version listed below as seen in below image then it is installed correctly otherwise do fresh installation.
Appium Installation:
Let’s start with Appium server installation which is bridge between your device and written scripts which is important to perform automation testing on Mobile applications in Windows as well as in Mac Operating systems.
Steps to install Appium server in windows for Mobile testing:
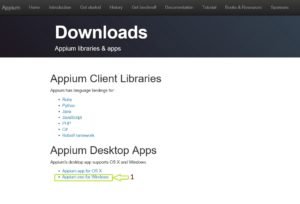
Step 1: Type http://appium.io/downloads.html this in your browser and hit enter. You will be redirected to Appium downloads page where you can download Appium server for windows as well as Mac OS. Select Appium.exe for Windows as shown in the below image.
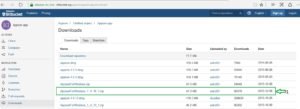
Step 2: Now you will be re-directed to list of download files which are sorted based on release dates. Recent/Latest builds will appear on the top of the list, select AppiumForWindows zip file with latest version by seeing latest date released and version name mentioned in the name of the file.
Example: In the below image there are many files in that select AppiumForWindows_1_4_16_1.zip file because that is the latest version released by Appium till date, if any other version is released it will be above this file and we would download that one. About the version we can see 1_4_16_1 in below image infront of file name indicates the version of the Appium version.
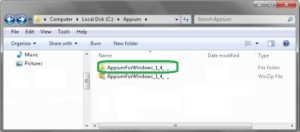
Step 3: After installing zip file into your machine extract the zip file into any folder and you will see like this after extracting the files as below image.
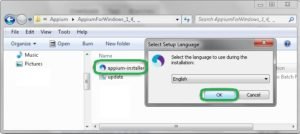
Step 4: Open the highlighted folder and you can see the setup file named Appium-installer double click on that and a pop-up appears which starts your installation process. Click OK to proceed further.
Step 5: Click on Next as shown below with default settins

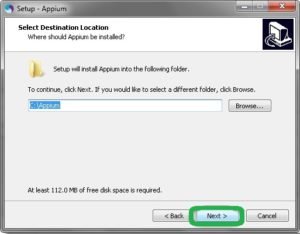
Step 6: Click next with default location of installation. If possible change the directory to C:\ Appium and hit Next as shown in below image.
Step 7: Keep the default settings as it is and select Next.
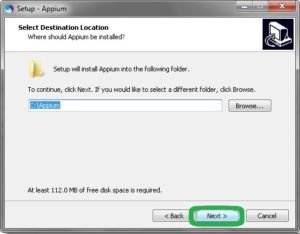
Step 9: Click Next
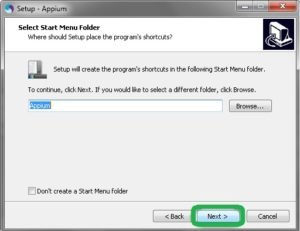
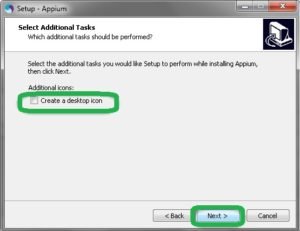
Step 10: Click on click to create a desktop icon and hit next
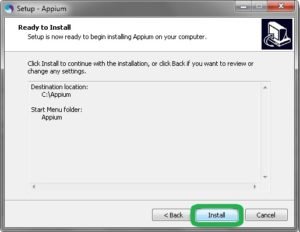
Step 11: To start installation with these settings select Install button.
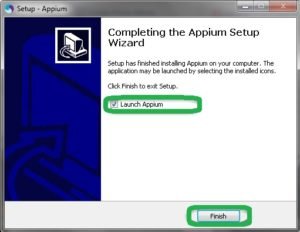
Step 12: It takes some time to install, please don’t press anything during set up to the installation, let it finish until this pop-up displays as shown below. Click the check box to launch Appium server as soon as we hit Finish button and click Finish.
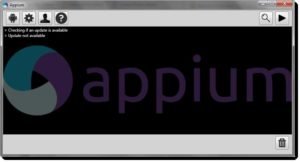
Step 13: After launching Appium server looks like this and to start the server just select the play icon present at top right corner and wait server to launch. This may take time initially but after first invocation later it will respond faster.
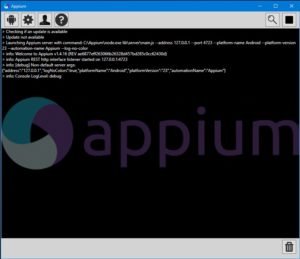
Step 14: After clicking on Play button present on the Top Right Corner of the Appium Server wait for few minutes to fully launch the server. Observe the image below, wait until the last message appears and start your process.
After installing Appium Server next we need is Appium Client libraries and that can be downloaded from the below steps
Step 1: Type http://appium.io/downloads.html into your browser to open Appium downloads site. Based on which language you are planning to write select respective language link for example for Java language click on Java as shown below.
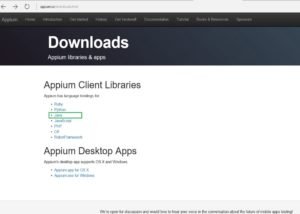
Step 2: It will re-direct to central Repository where you select jar link to download the required jar file as shown in the below image. Jar file will automatically start downloading into your machine.

Thanks for reading this. If you have any questions or issue with setting up Appium for Mobile testing, any request for future blog topics for us to cover, then write down in the comment section below. We have also published many software testing training videos on our website.
Leave a Reply